
AlFakhir - Education Next.js
Created : 13 February 2024
Last Update : 13 February 2024
By : Vyse Solution
Email : Email Me
Al-Fakhir CODE : GitHub
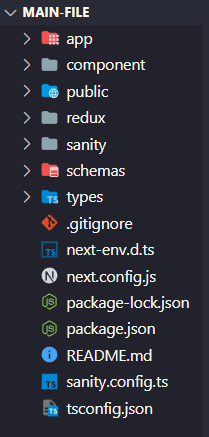
Main File Structure
All the file are well organized, its so easy to work with the template.
1. Unzip the mainFile.
You will find 7 folder and 8 other files.
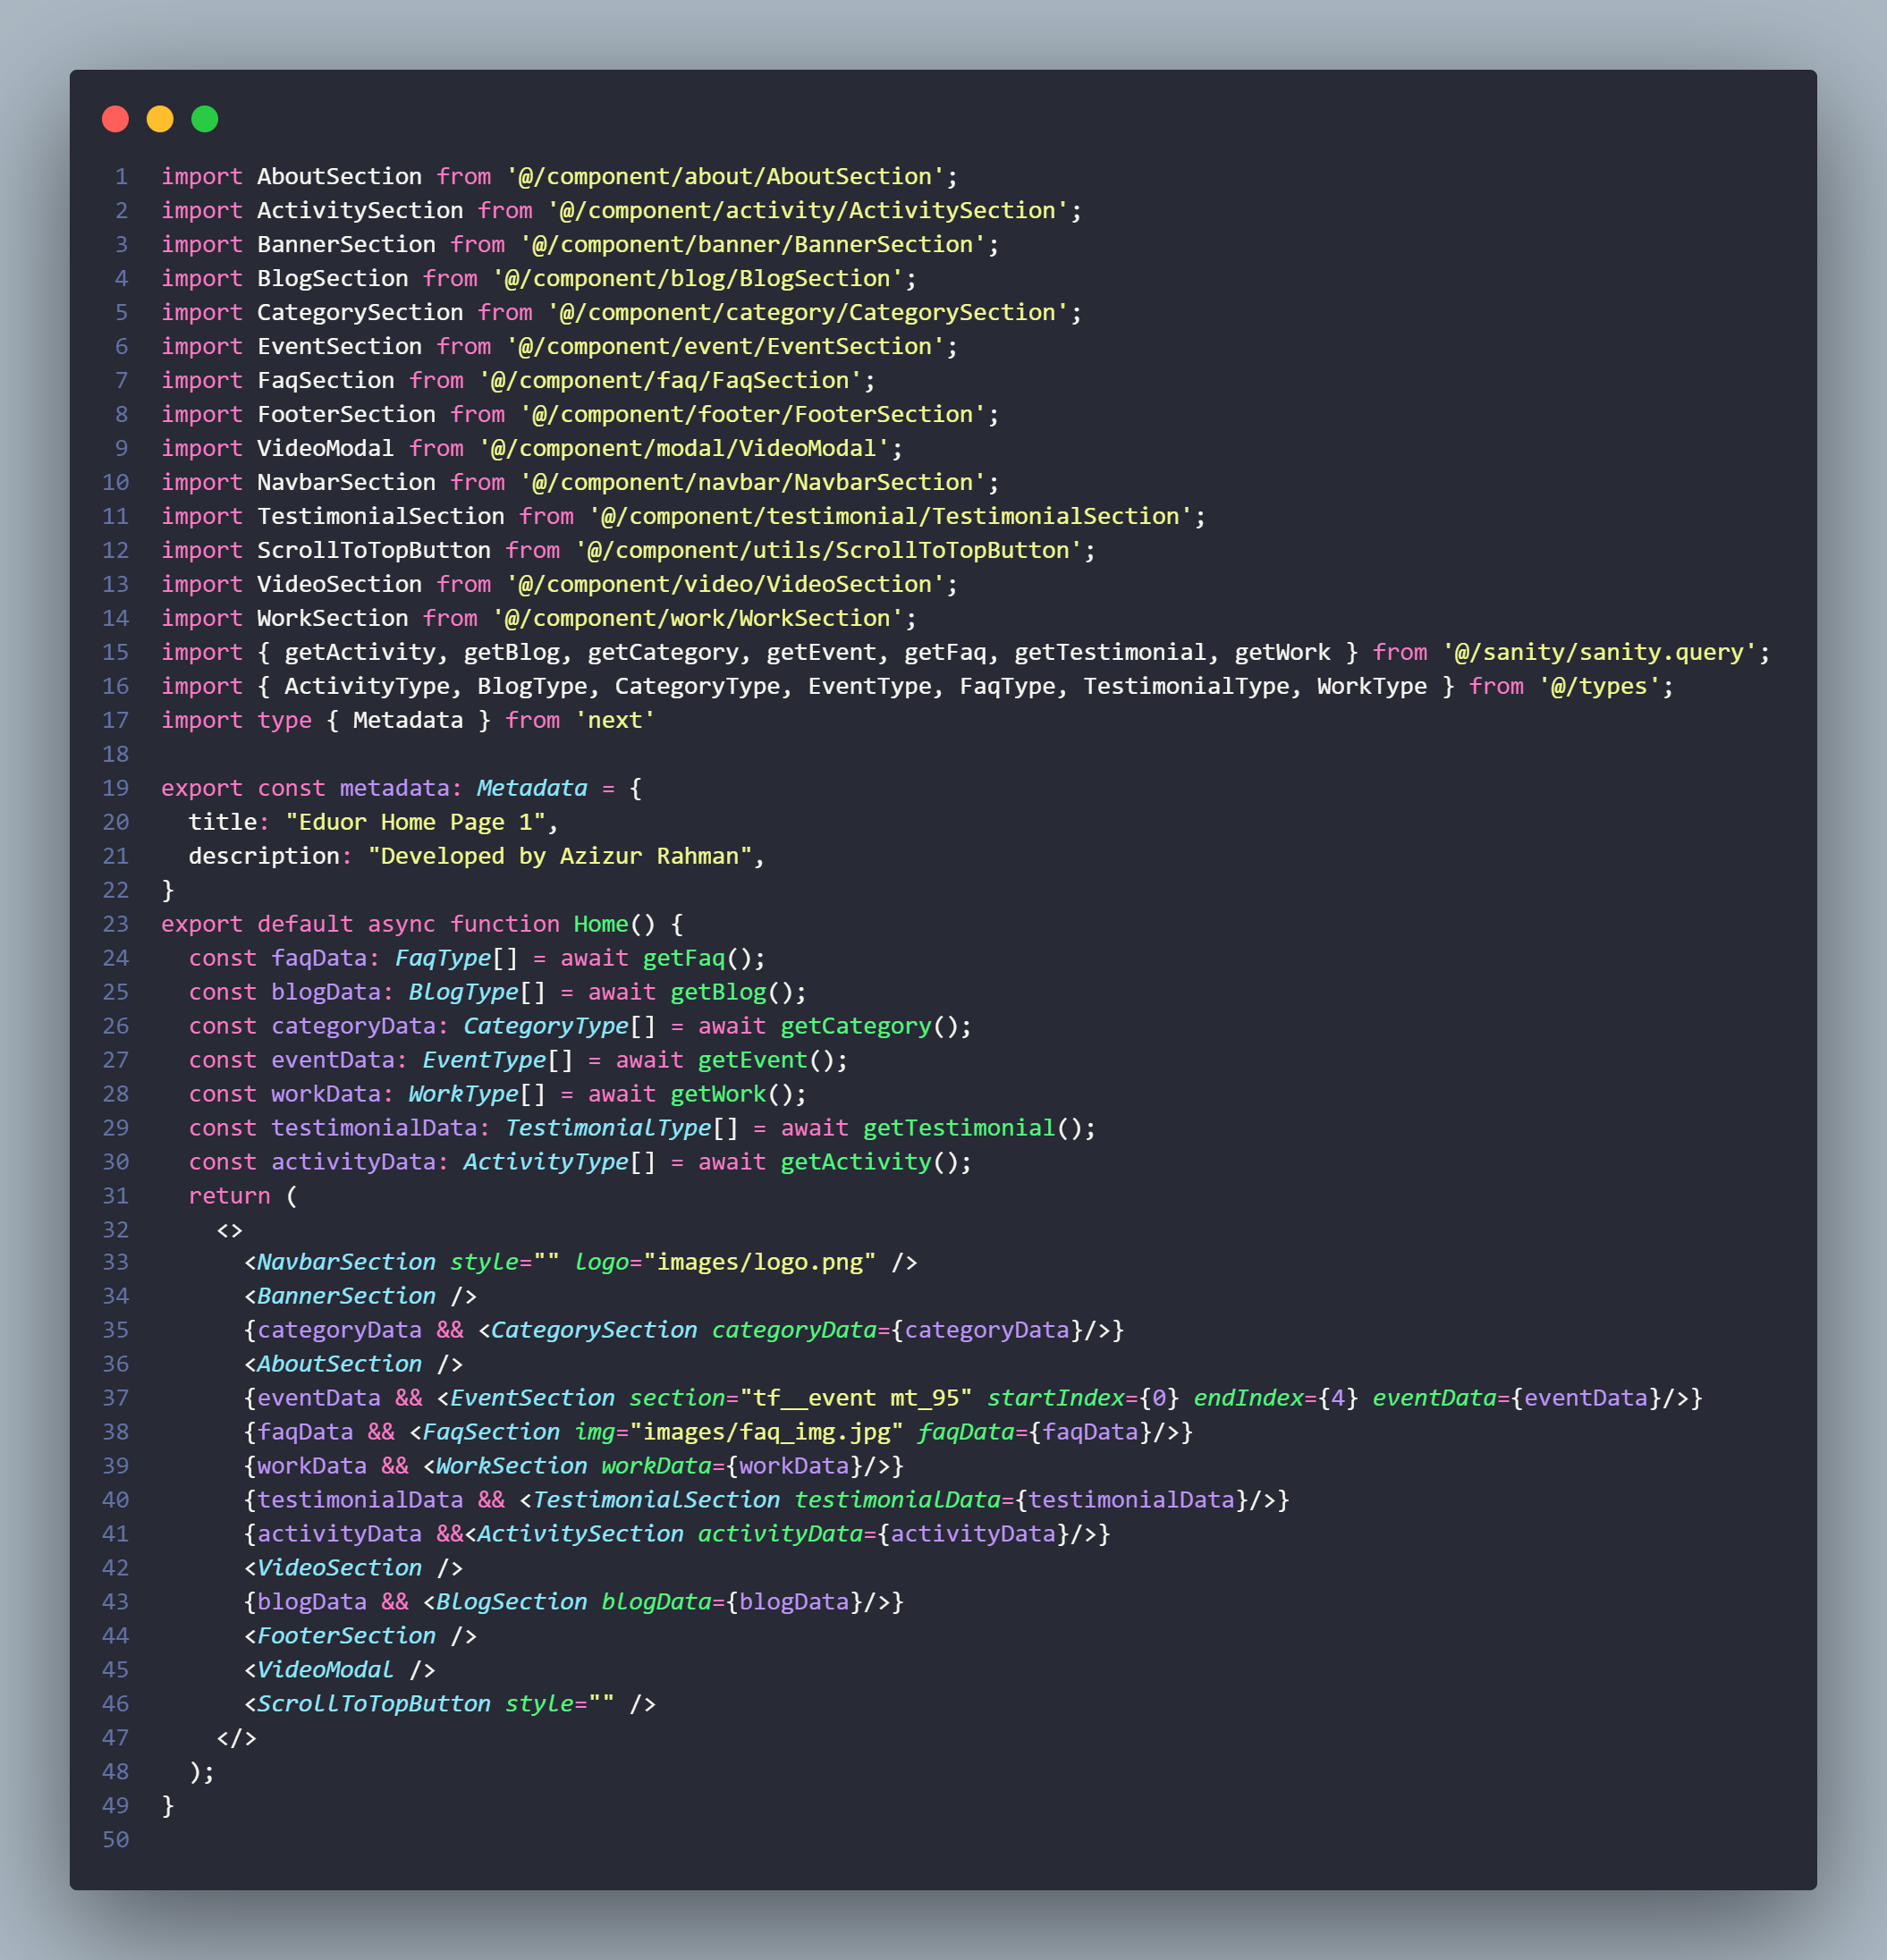
In the app folder there are all the pages for the template any folder created in this folder will become a page and take page.tsx as index of that directory. The admin directory stores the dashboard of sanity admin panel.
In the component folder there are the components of the template that are used all around and from here the components can be modifed according to your need.
In the public folder there are assets like css,font and images.
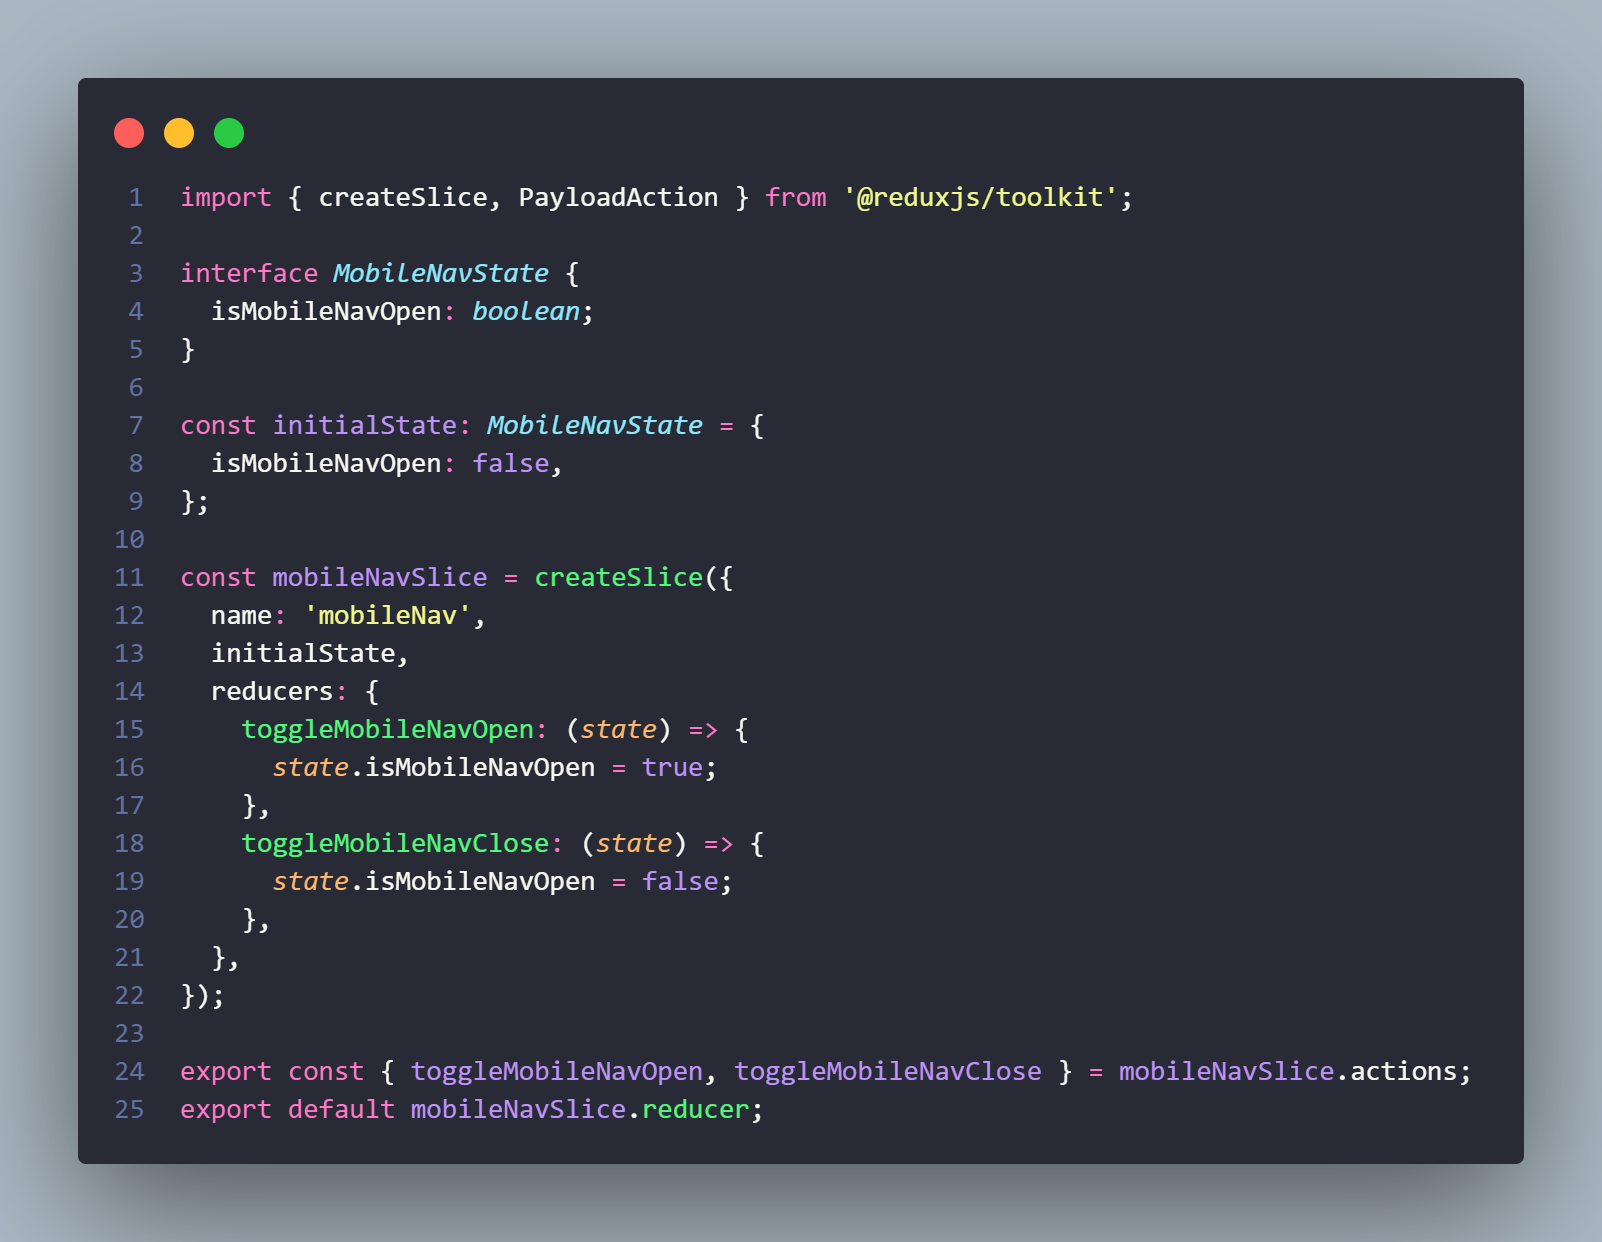
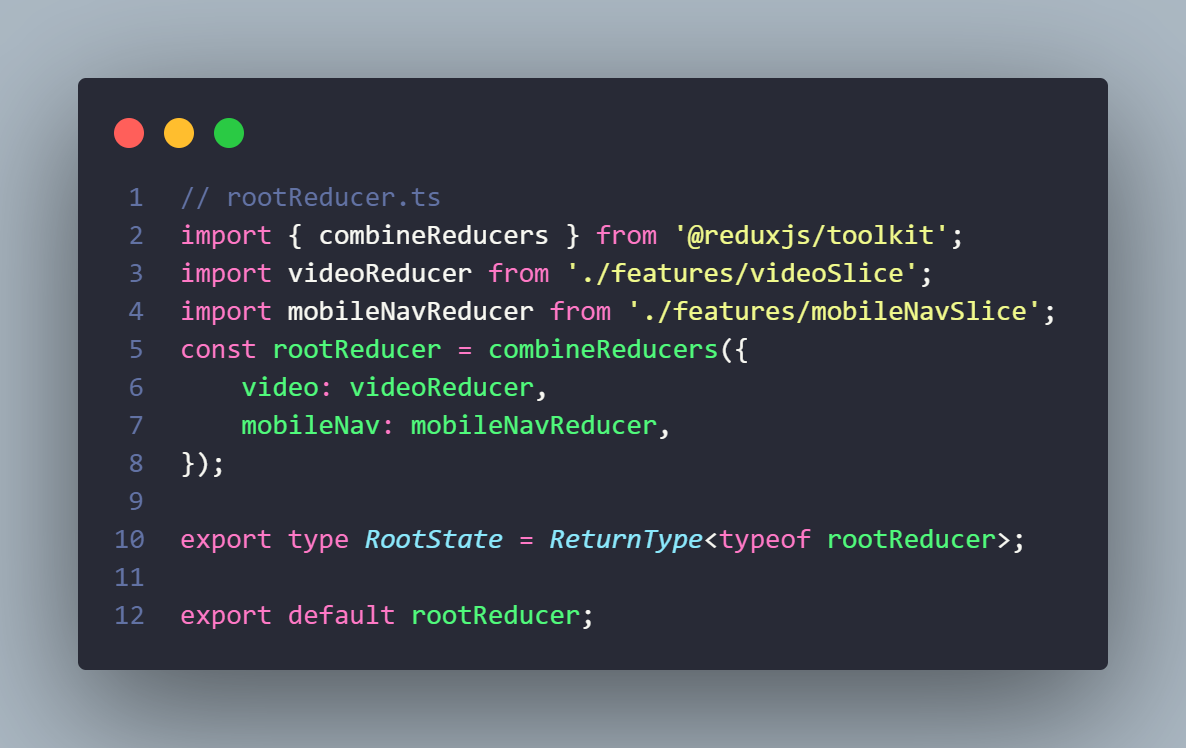
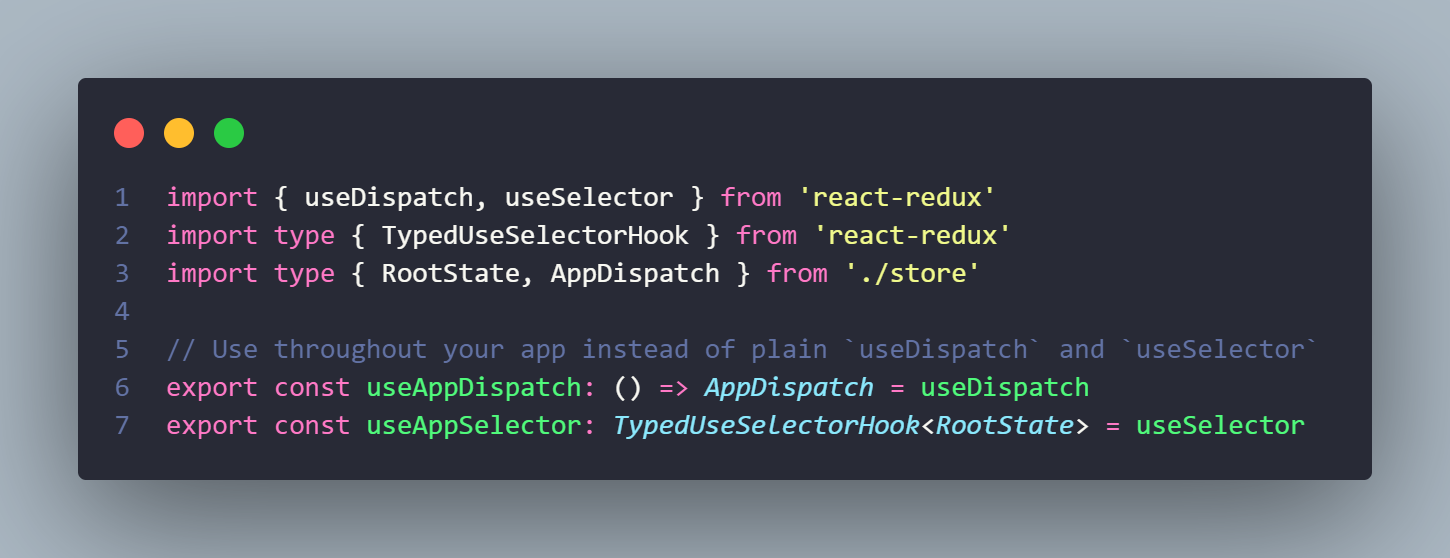
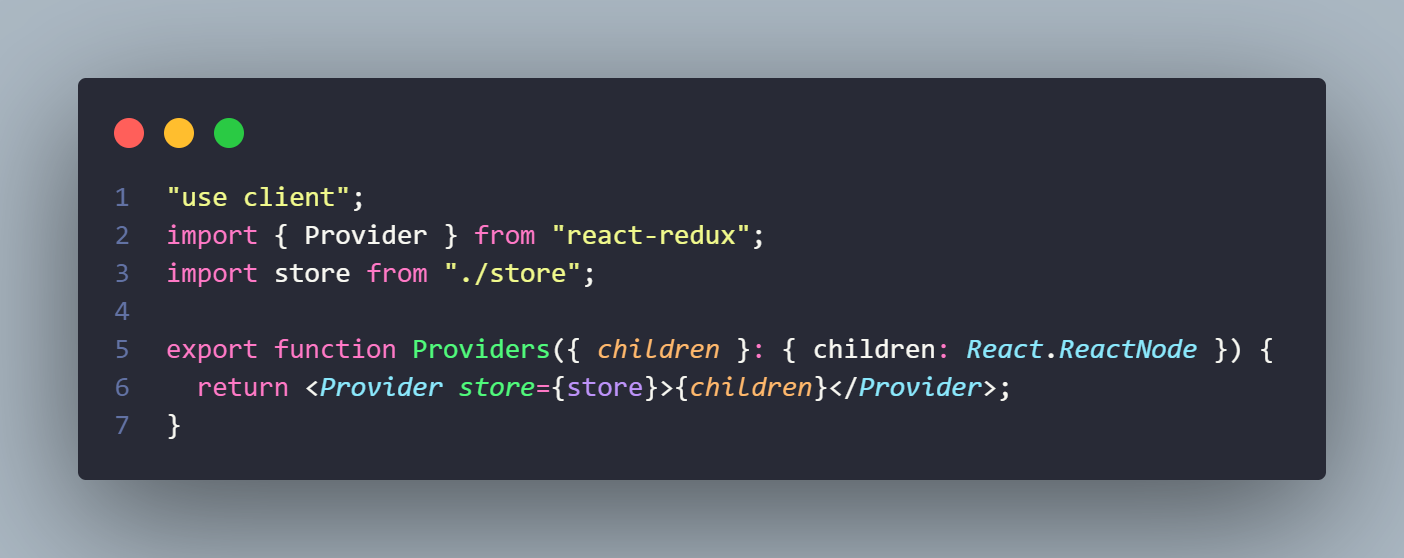
In the redux folder there are files which contains all the state management logic for the template.
In the sanity folder there are two files. One is to connect to sanity client and another one is to query data from sanity dataset and those that will be used in the template.
In the Schemas folder there are schemas for the sanity dataset. In this you can add or modify the dataset structure of the sanity cms. All the schemas are imported in the index of the directory.
In the type folder there is index.ts file in which contains the data type of query data used in the template.
The rest of the files are .gitignore, next-env.d.ts, tsconfig.json, next.config.js, package-lock.json, package.json and readme file.
Configuration
Initial Steps you need to follow:
1. Unzip the main-file. And run "npm install" in the root directory of the main file to install node modules.
2. You can checkout the demo using "npm run dev" in localhost. The current data of the template you will see the demo dataset data. To add your own dataset you will require a sanity account.
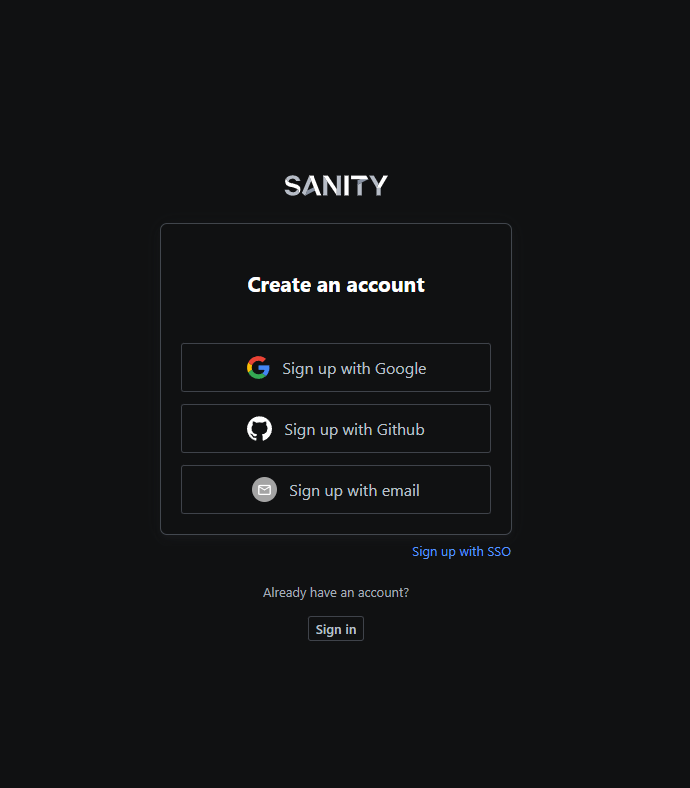
You'll typically need to follow these general steps for setting up Sanity CMS:
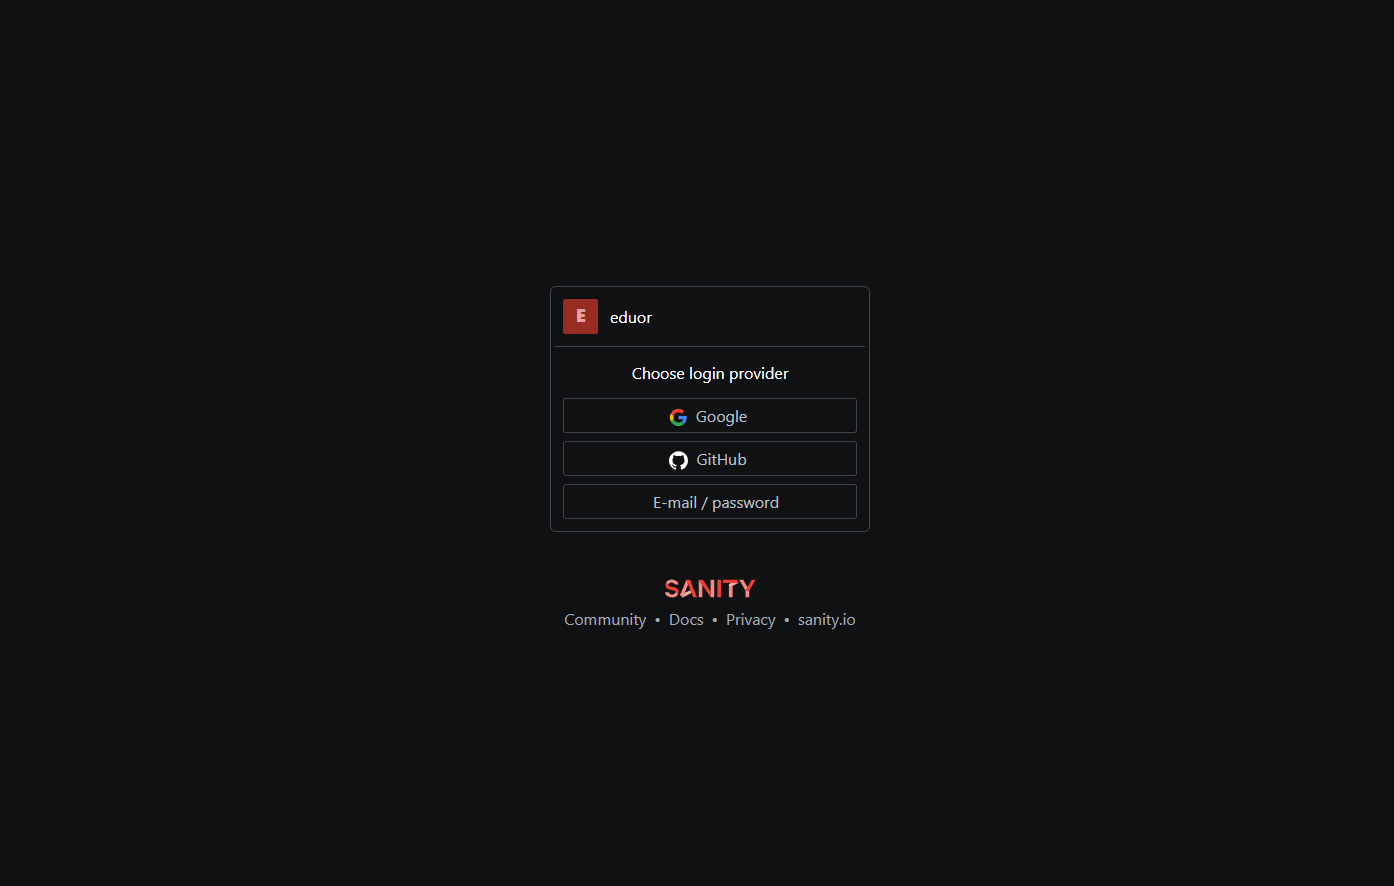
1. Create a Sanity Account:
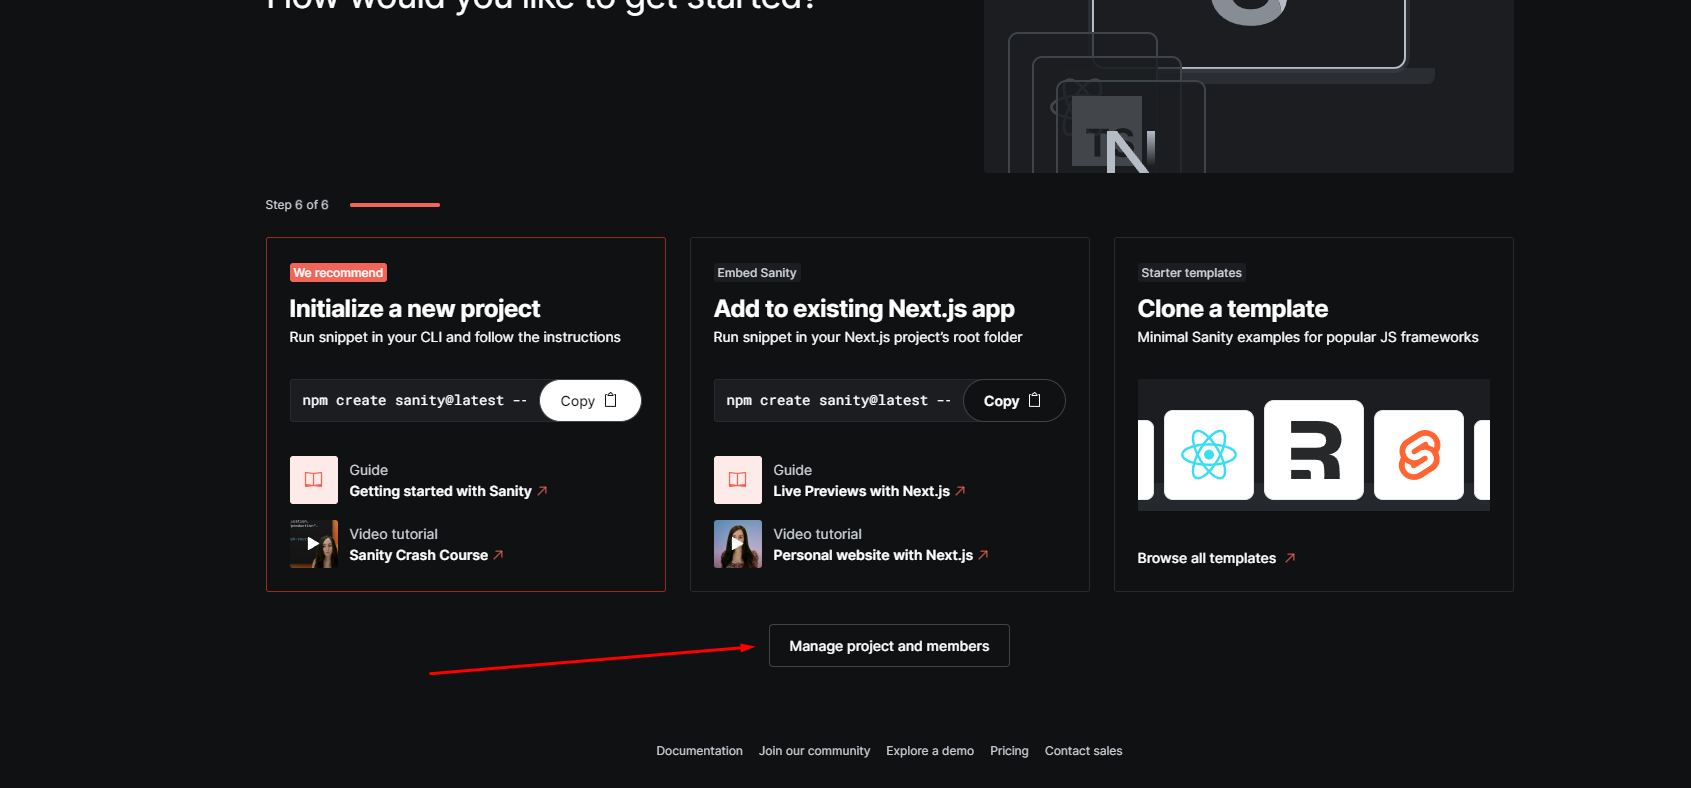
If you don't have a Sanity account, you'll need to create one at https://www.sanity.io/. Create a sanity account with a google account, github or email. You will need this account for getting in the admin panel of the cms and creating a dataset. Sanity provides a single free dataset if you want to upgrade you can checkout their pricing.
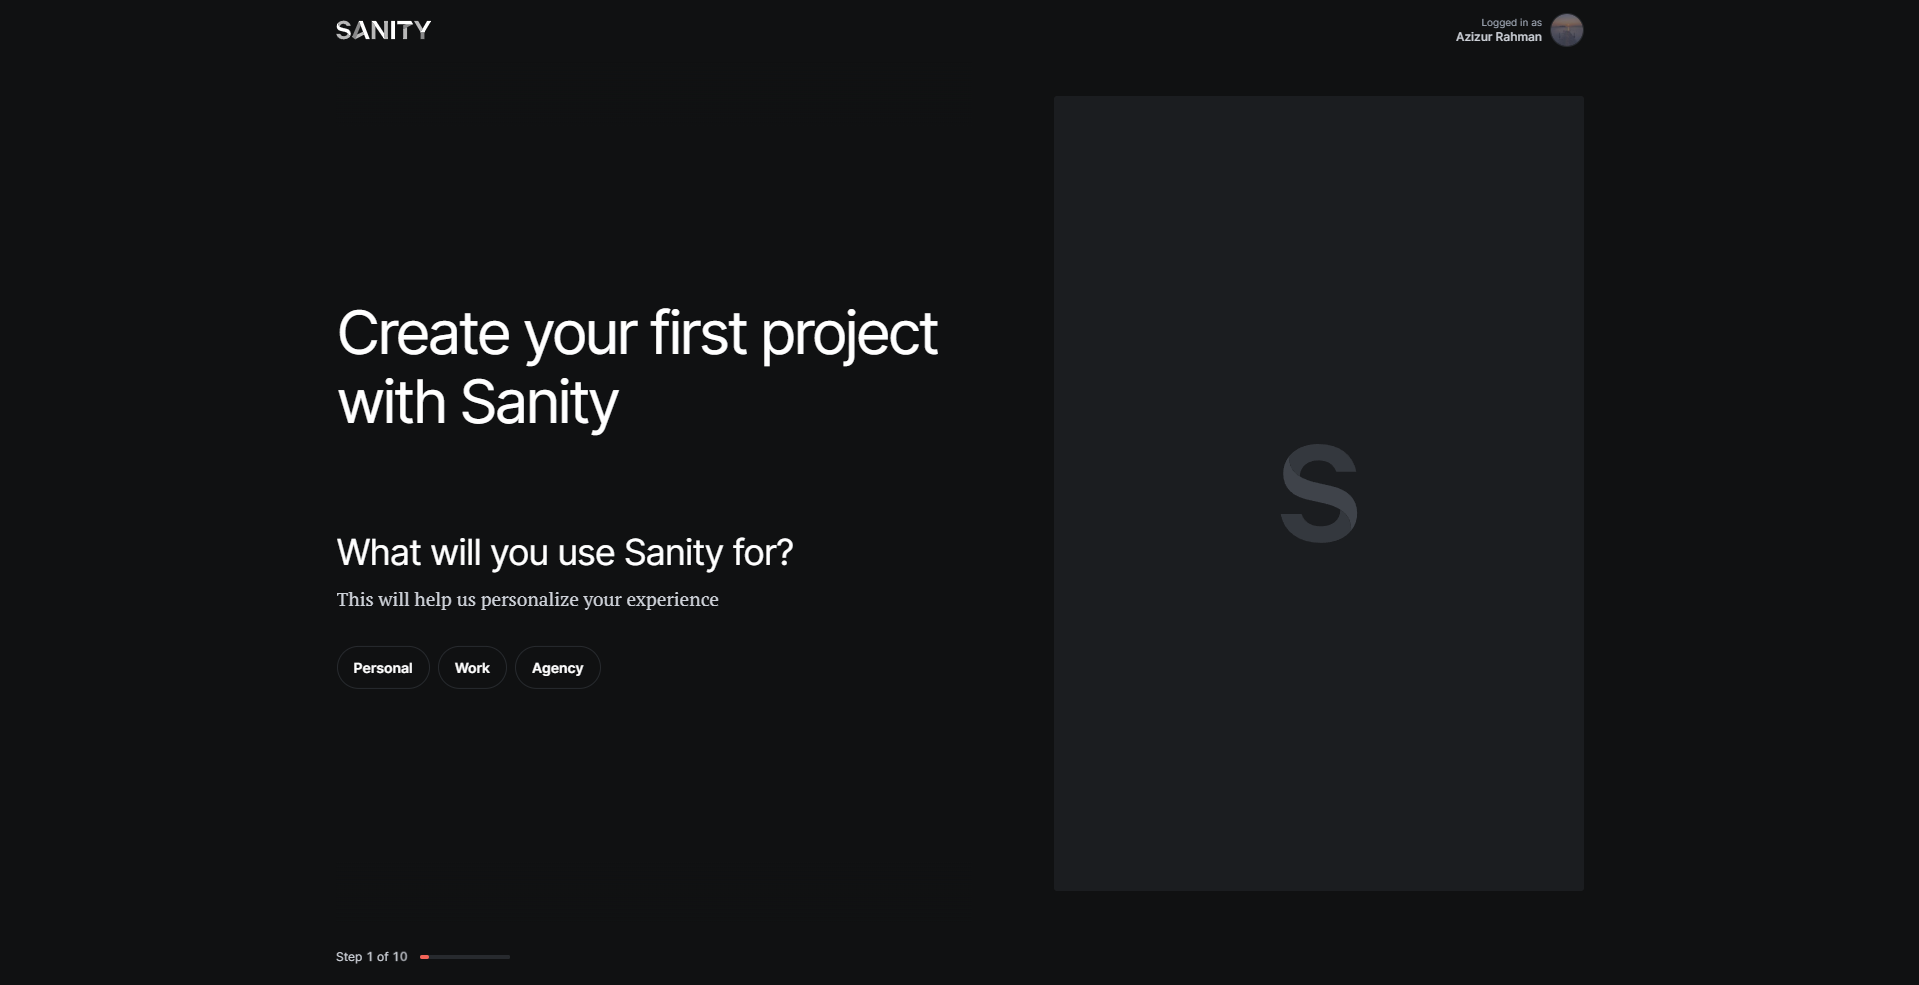
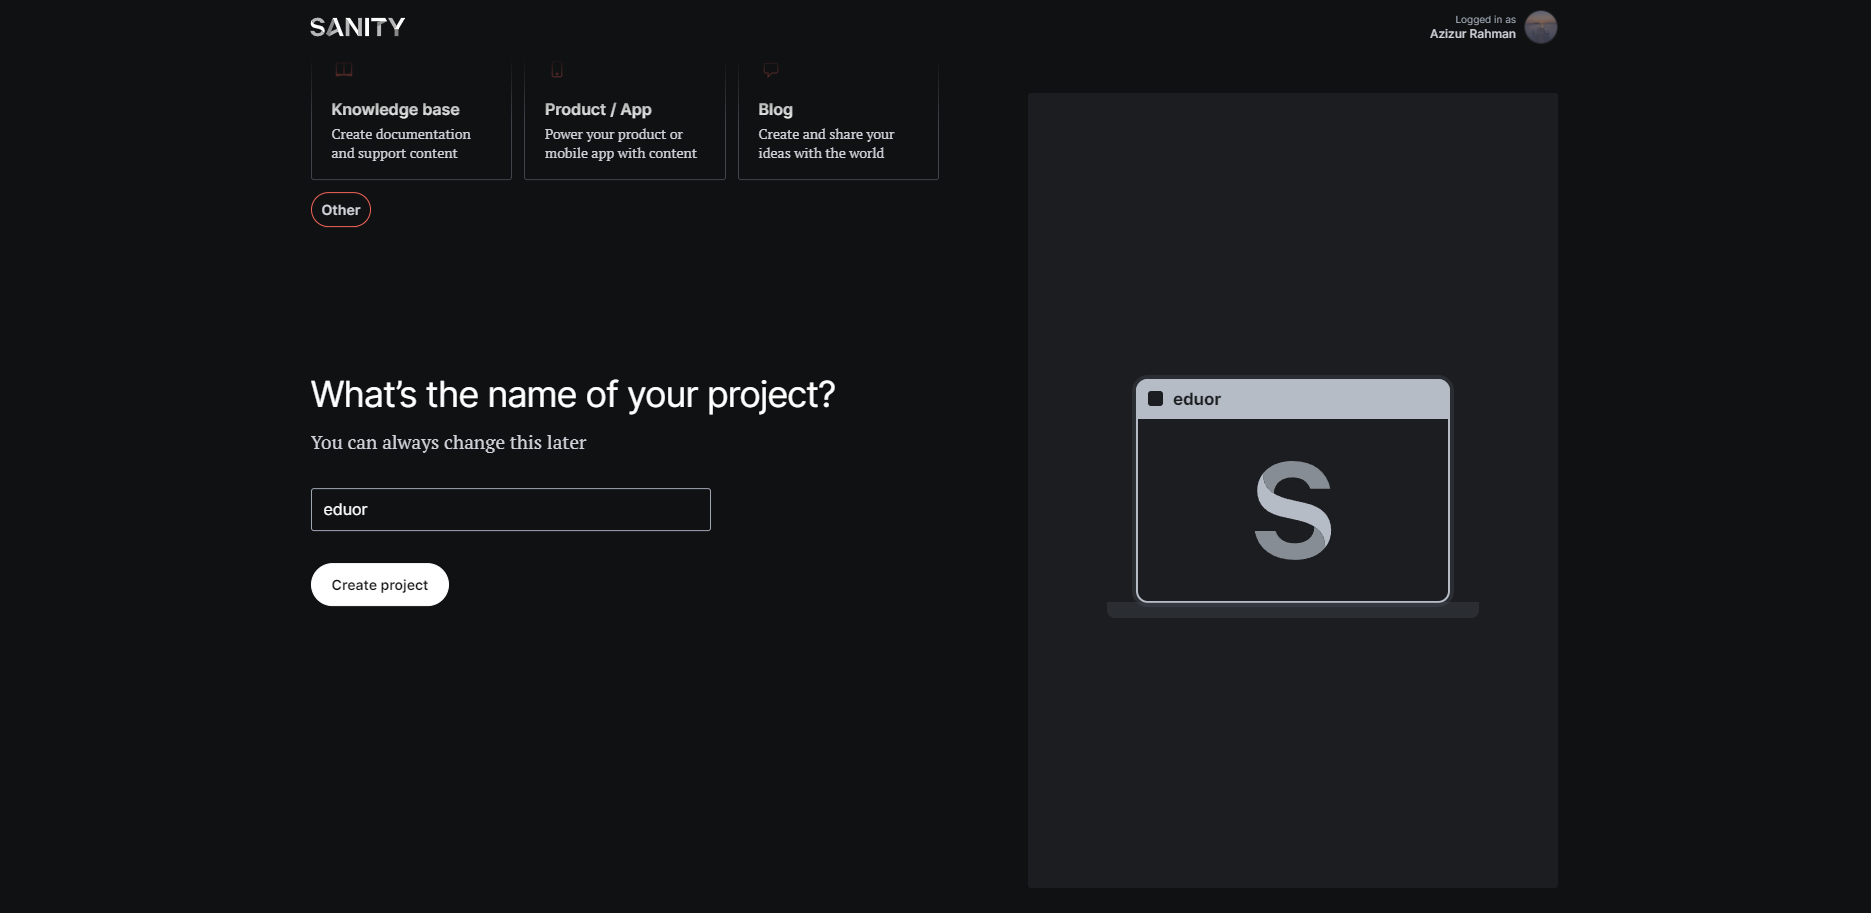
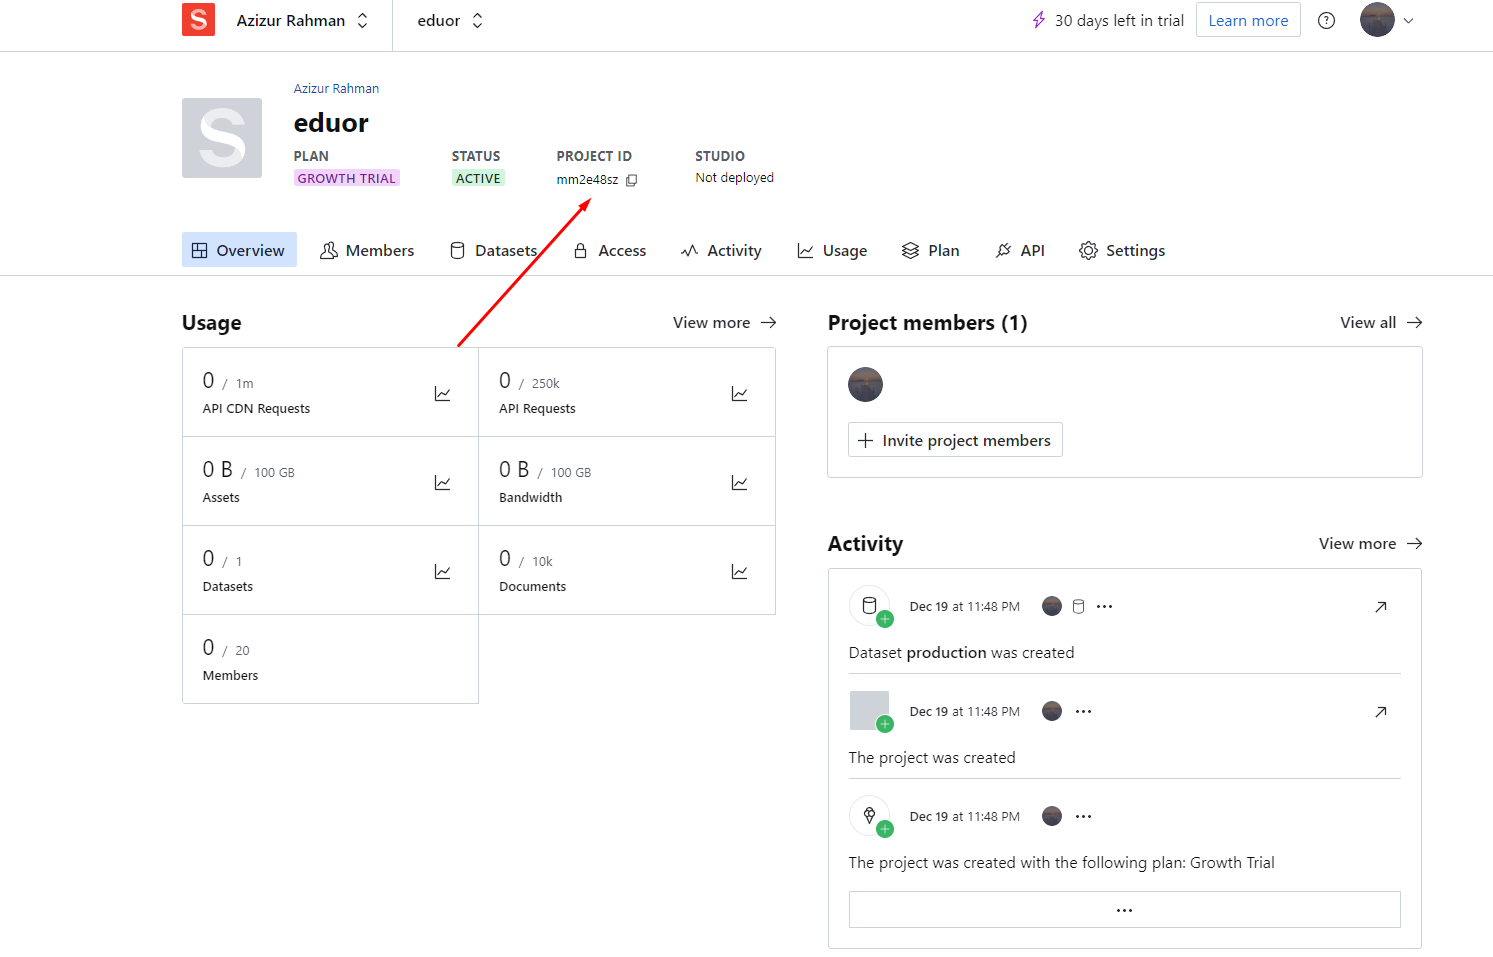
2. After creating a profile you will be redirected to a landing page where you will select some information and at the end give a name to your project and when the section comes to select or build a new project just go to manage section of sanity.
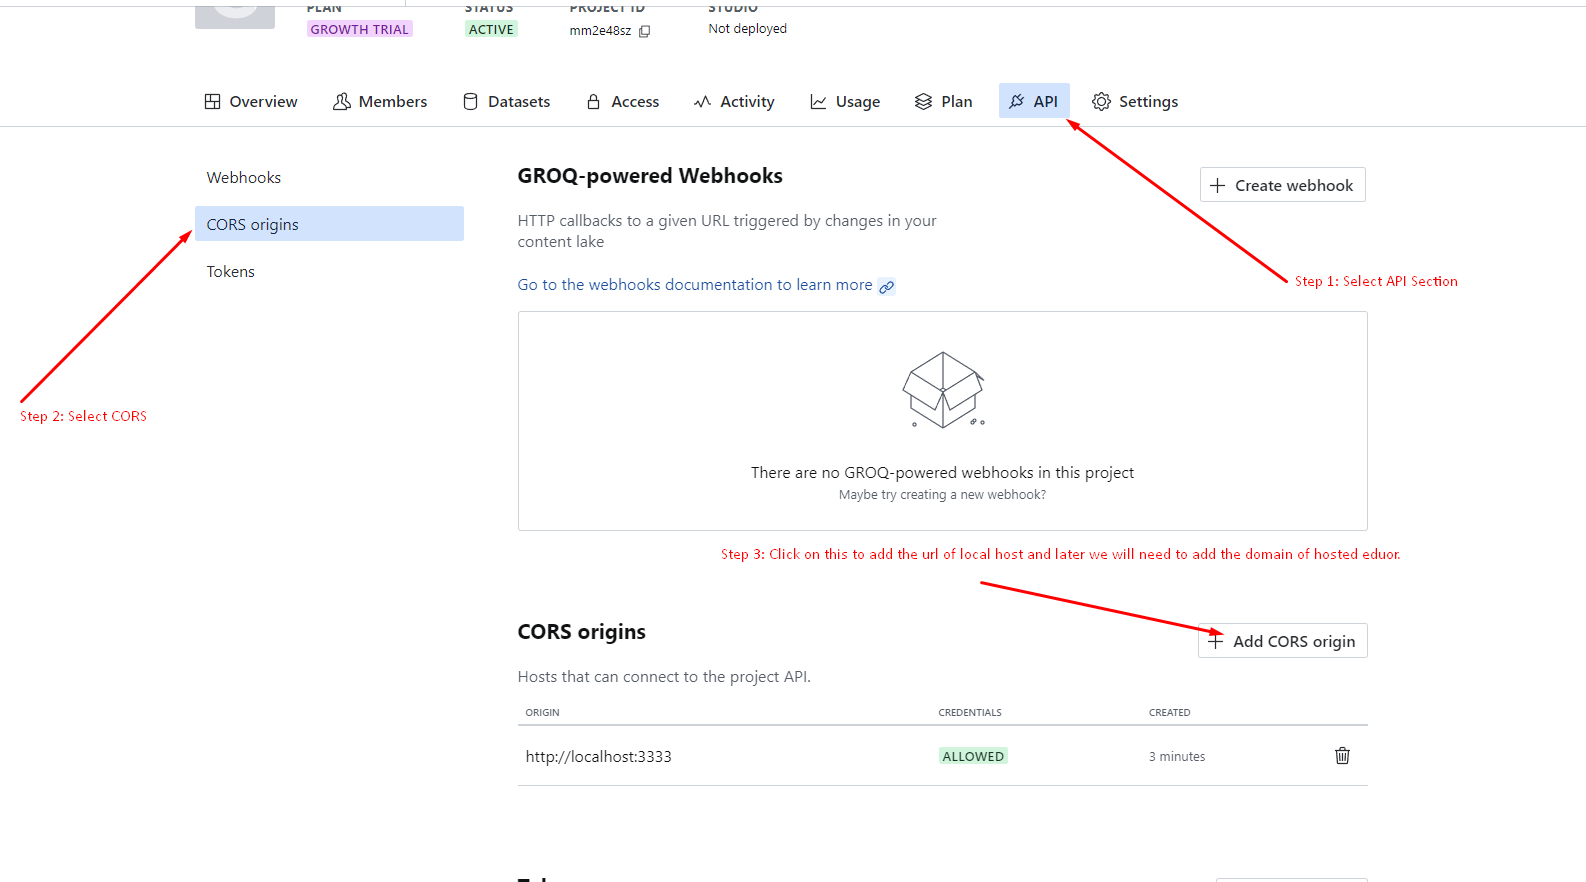
3. Navigate API section:
Select CORS origins section and add CORS origin of the localhost url. Most common localhost is http://localhost:3000/.
Connecting Sanity to the alfakhir
1. After creating Sanity Account head back to the main-file of alfakhir.
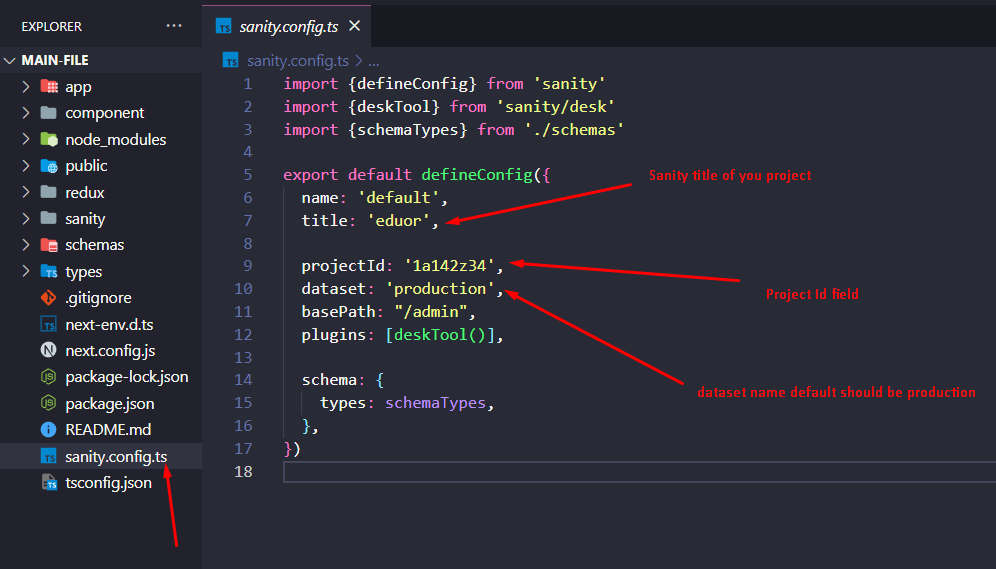
2. There is sanity.config.ts in the root open that in code editor. In the sanity manage page you will see your project id copy that and paste it in the sanity.config.ts projectId field. Also adjust the title and dataset according to your created project configuration in sanity.
3. We also need to update sanity.client.ts file which is in sanity folder. Just put the projectId and dataset name in that.
Populating the database
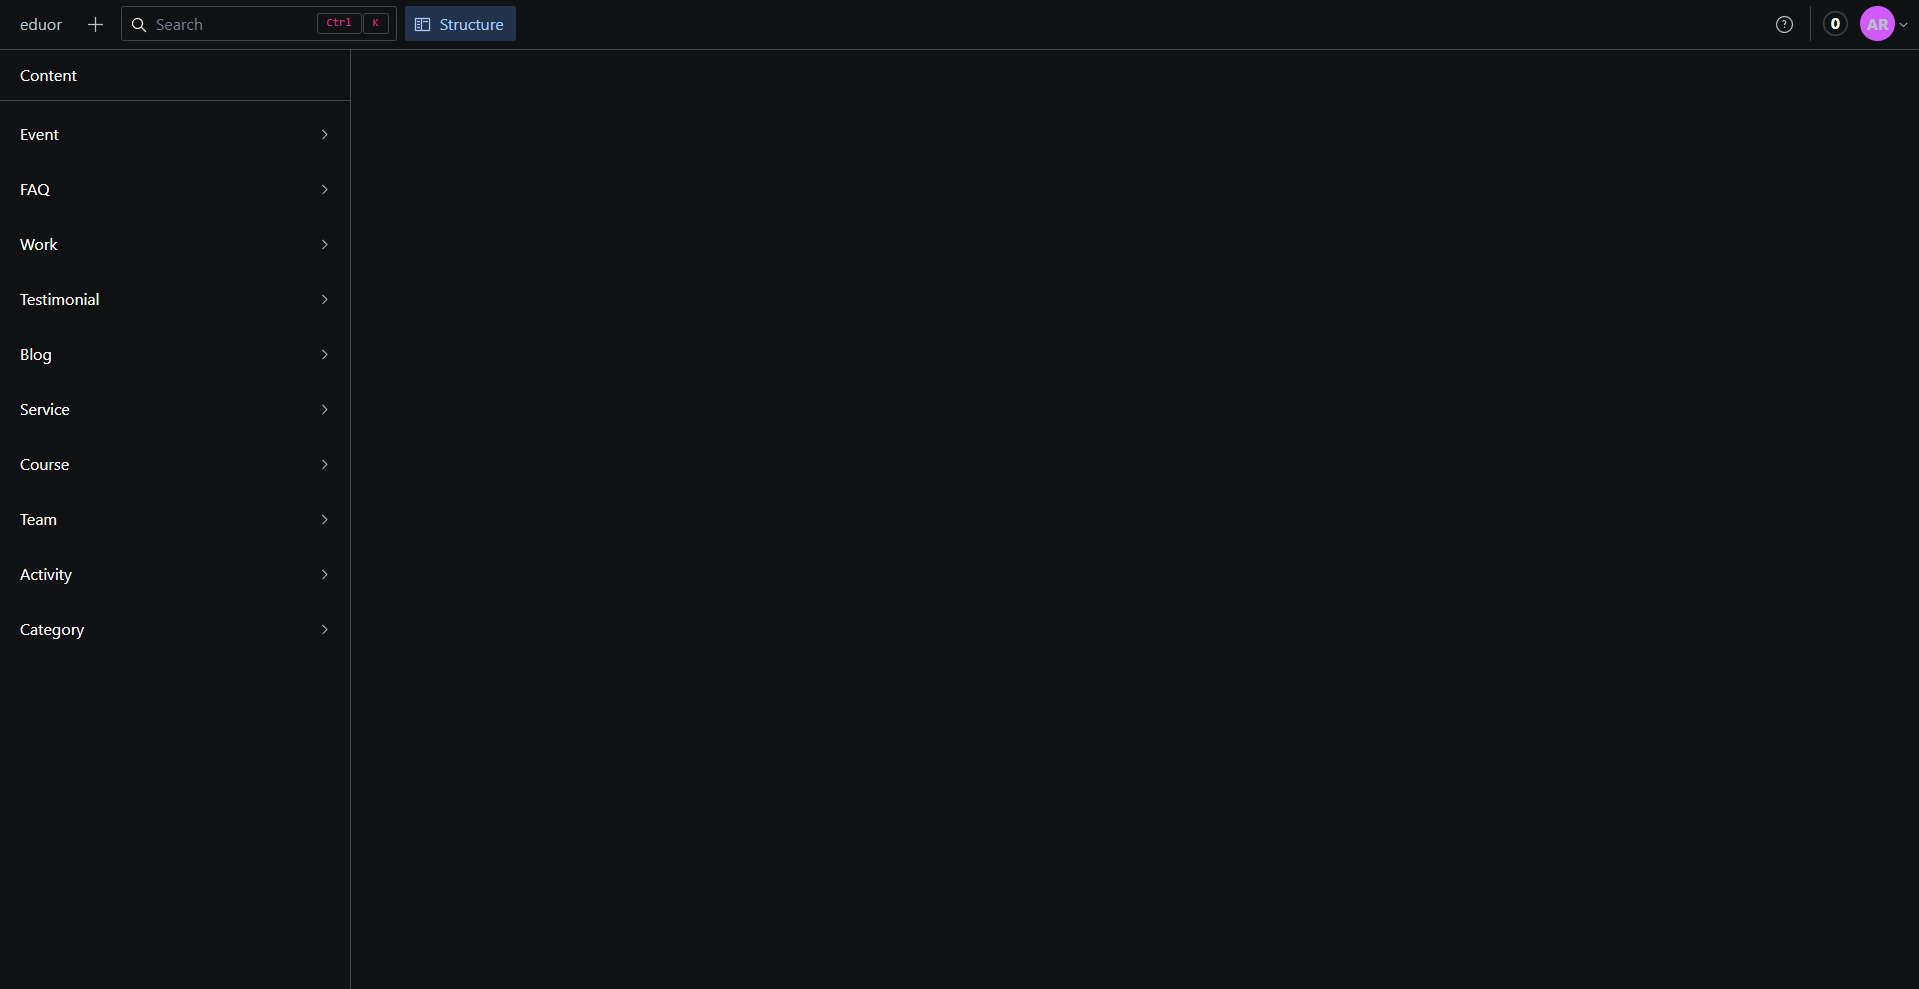
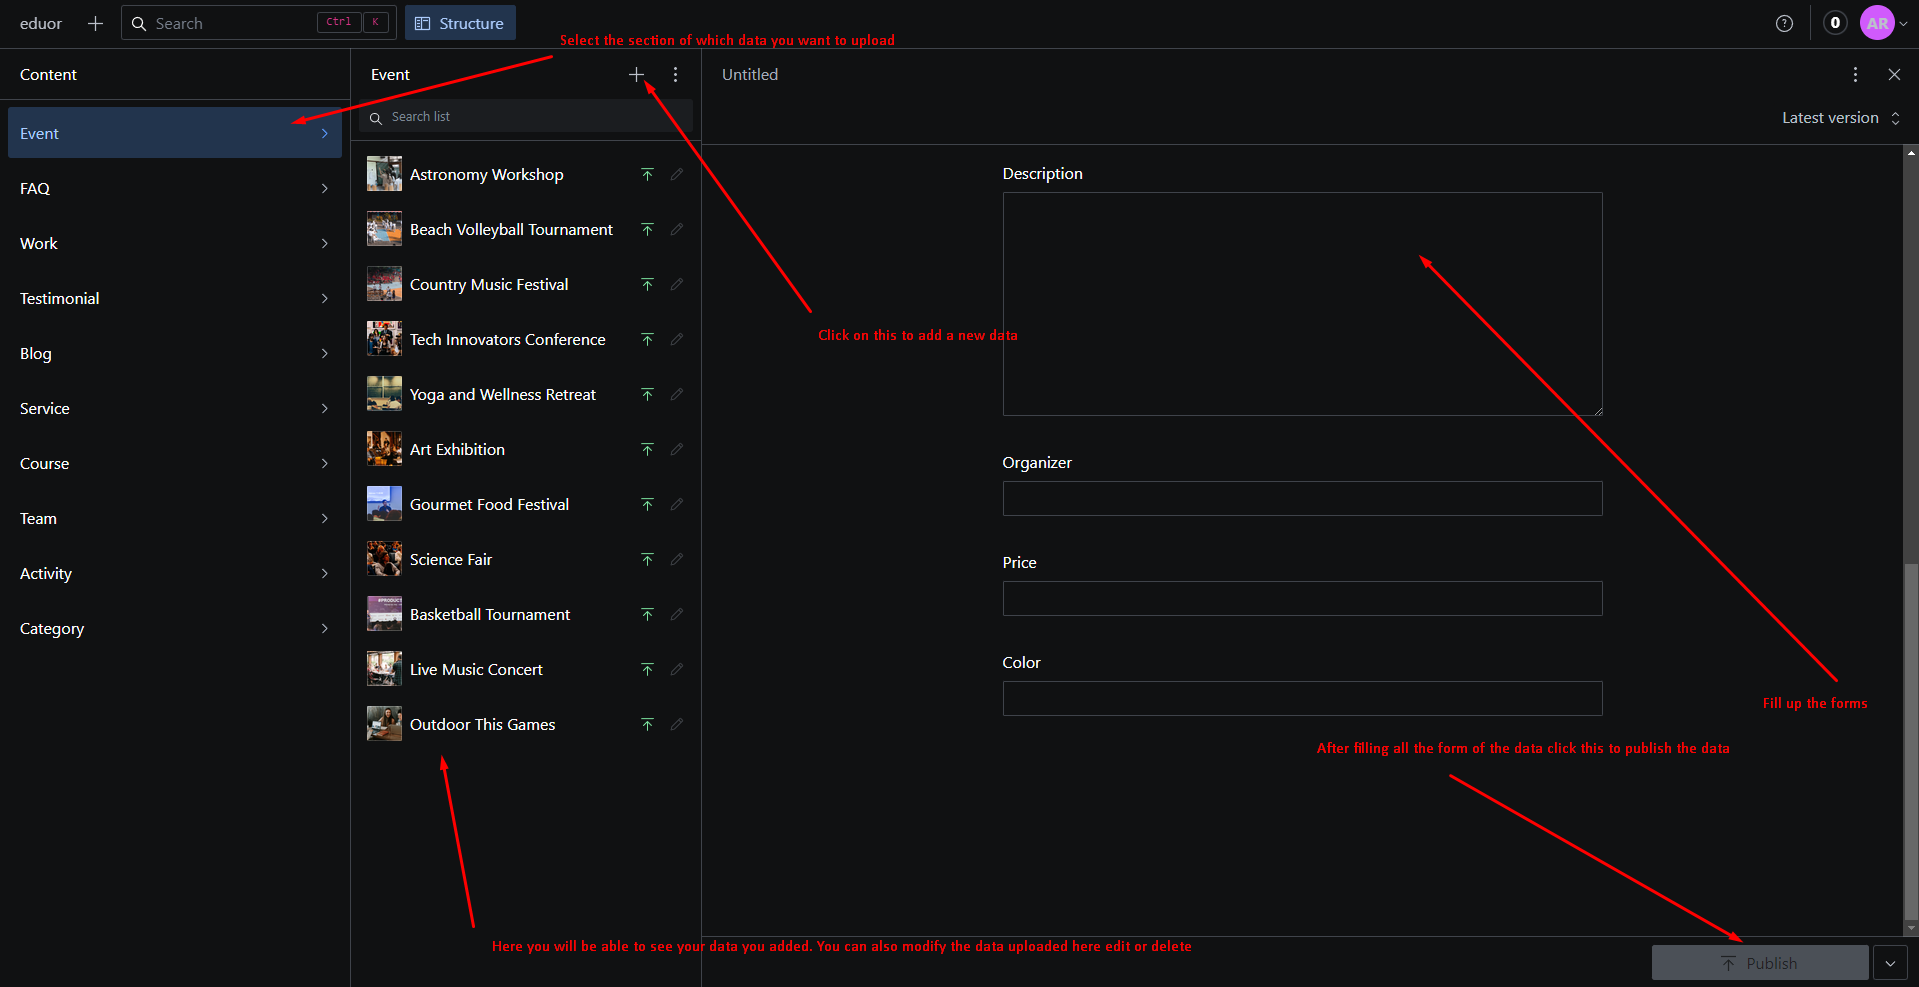
1. After adding your database at initial your database will be empty so you need to upload the data you want to display in the sanity admin panel.
2. To access sanity dashboard start alfakhir in local server go to "/admin" like default homepage will be "http://localhost:3000/" admin panel url should be "http://localhost:3000/admin".
3. To access the database you will need to authenticate with the account you created the sanity account. After authentication you will be redirected to the admin panel where you can upload the data. The schemas are predefined in the schemas folder. If you want you can customize the schemas according to your need in there.
Screenshot of creating a sanity account

Screenshot of connecting sanity account in alfakhir

Screenshot of populating the database
Components Structure
CSS Structure

Redux Toolkit
Structure of redux toolkit

App Directory Structure
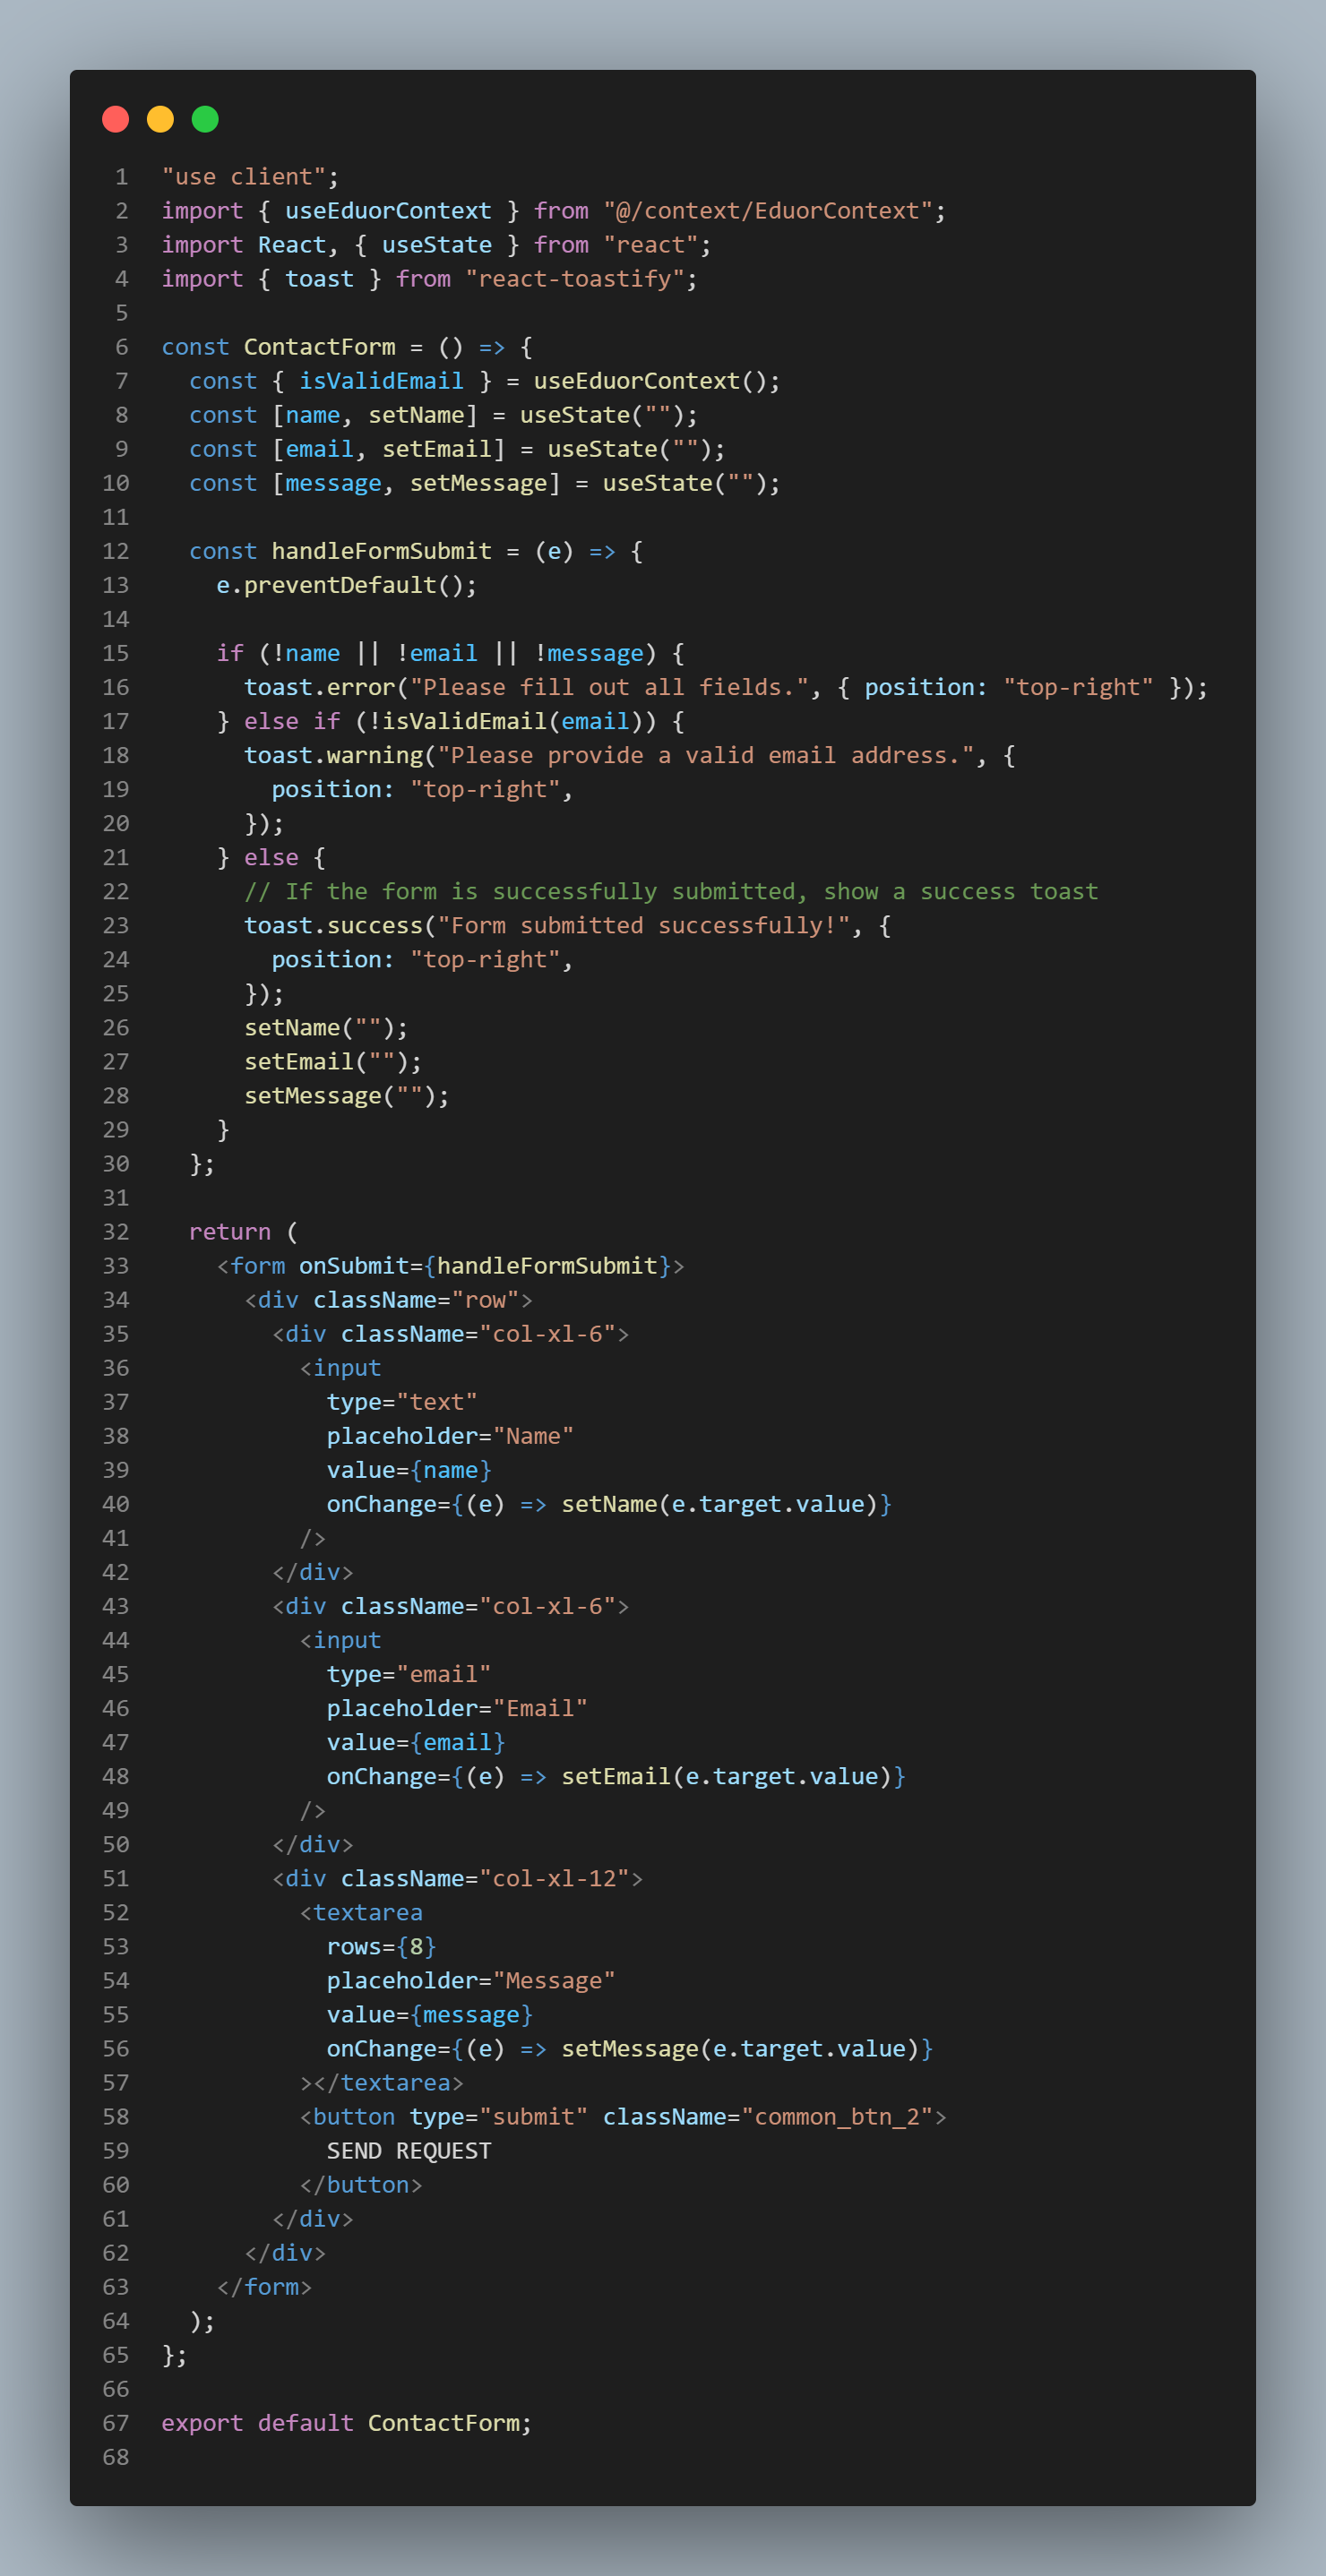
In the index of a page directory we fetch data from sanity. The query is done in sanity.query.ts file of sanity folder. The fetched data is sent to components that require the data by prop drilling.
To deploy alfakhir to Vercel
Make sure you uploaded the all the data in the dataset then check those data in localhost. After making sure the the template proceed to deployment to vercel.
1. Create a Vercel Account:
If you don't have a Vercel account, you'll need to create one at https://vercel.com/signup.
2. If yoy have a github account push the main file in a repository and link the github to your vercel account.
3. Navigate to Vercel overview:
Click add new. Select project and if you have your github link you will see the repositories, select the repository of alfakhir.
4. After importing the repository you will be redirected to deployment page here you can change the project name and many other.
5. After selecting a name for the project just click on deploy button. It will take some time and after it will be live and a url will be given which can modified later on.
6. If you are importing from github continous deployment is supported in Vercel. If you update the code in github it will auto update the live site.
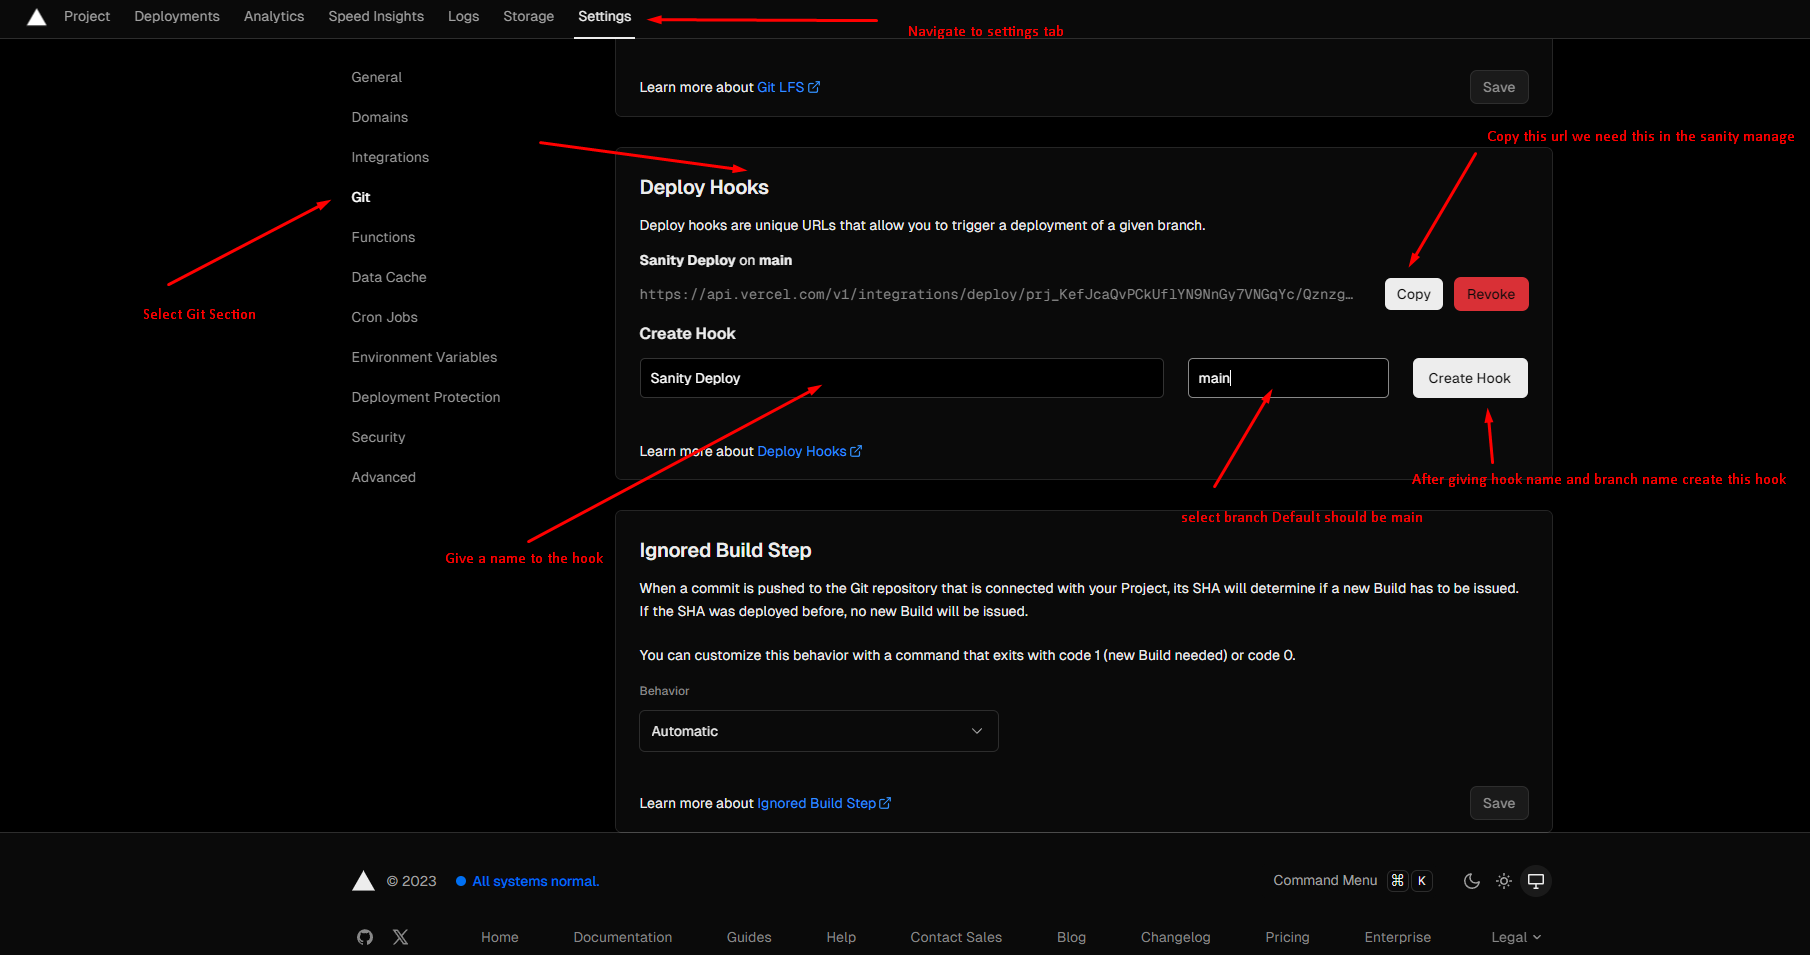
7. Now we need to configure vercel to redeploy the web app whenever a changes occurs in the date for that go to project details > setting section.
8. In deploy hook create hook by giving it name and branch name. After deploying the hook copy the url we will need that in sanity manage panel.
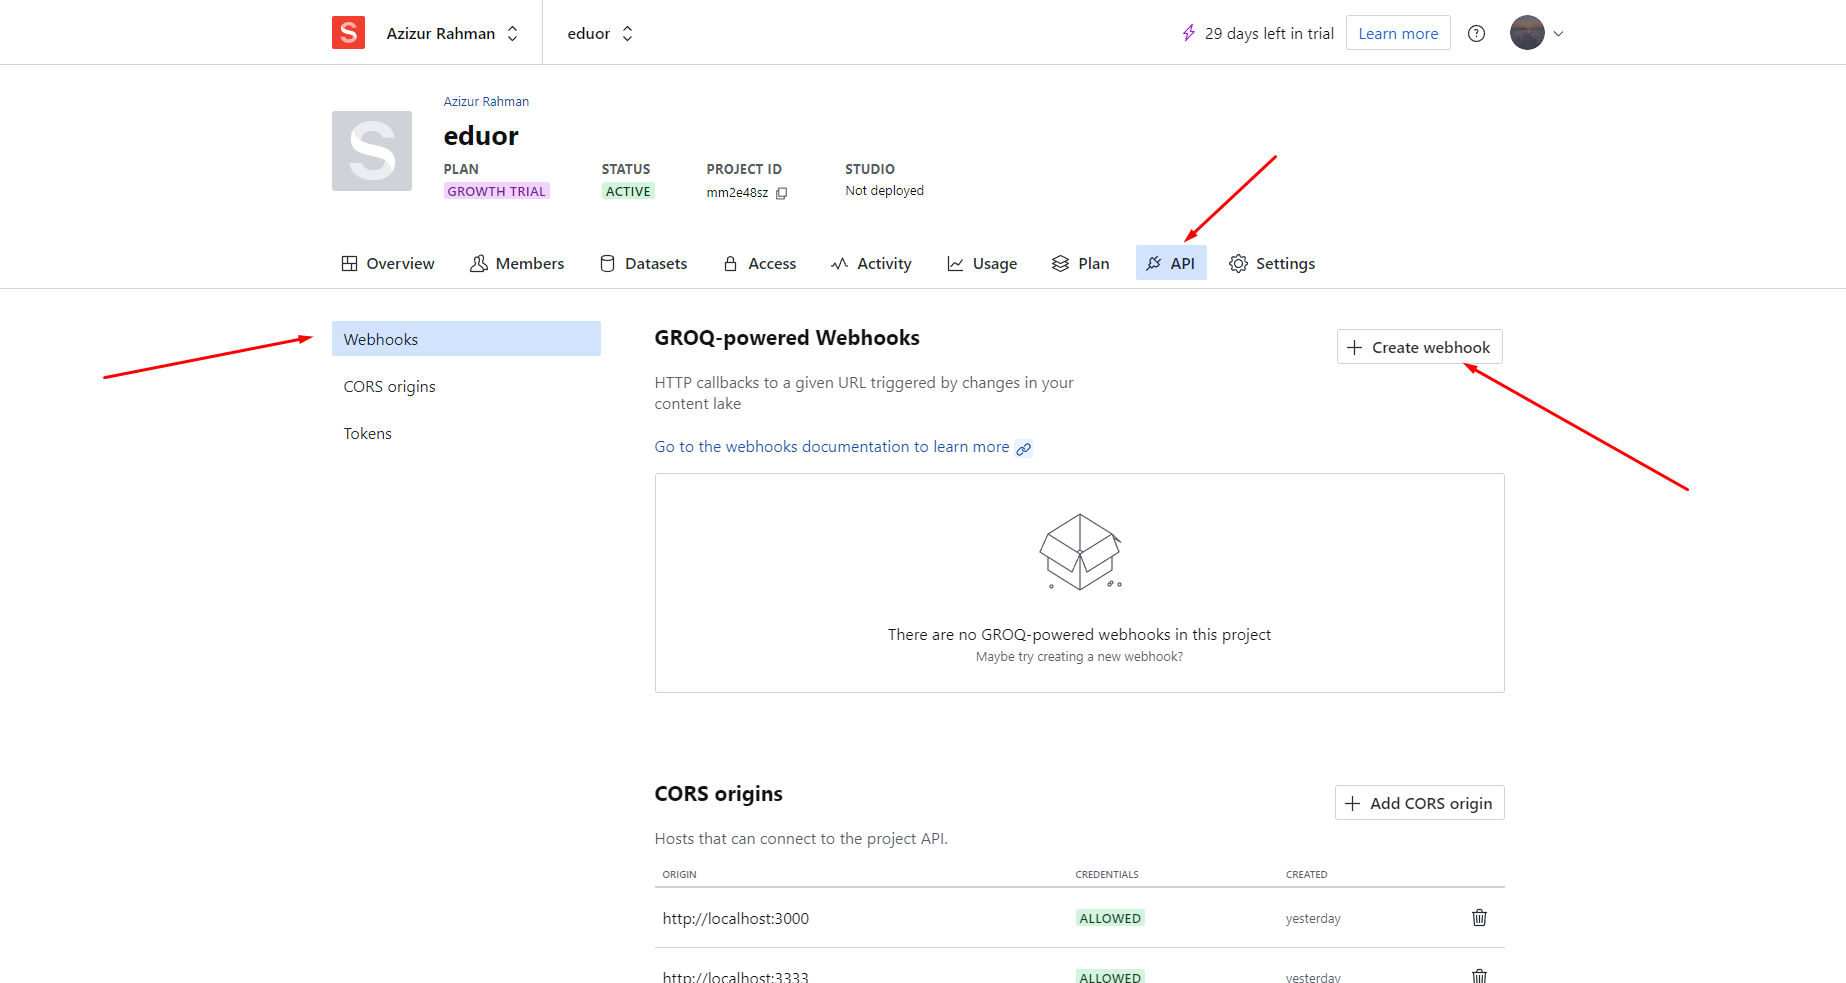
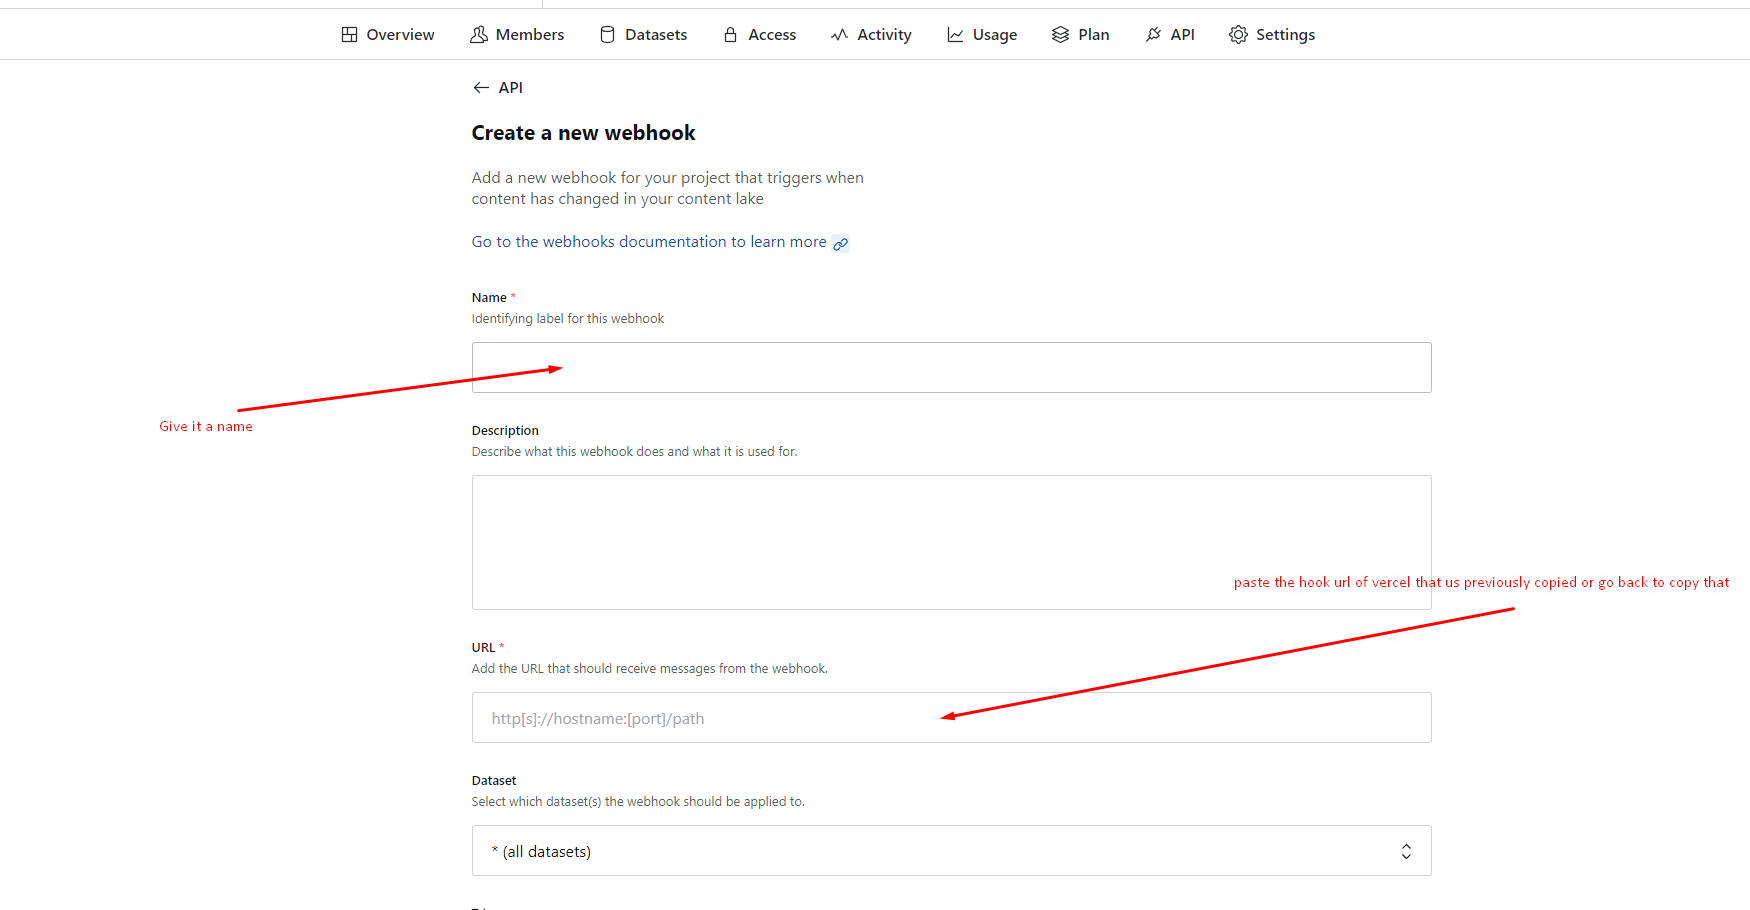
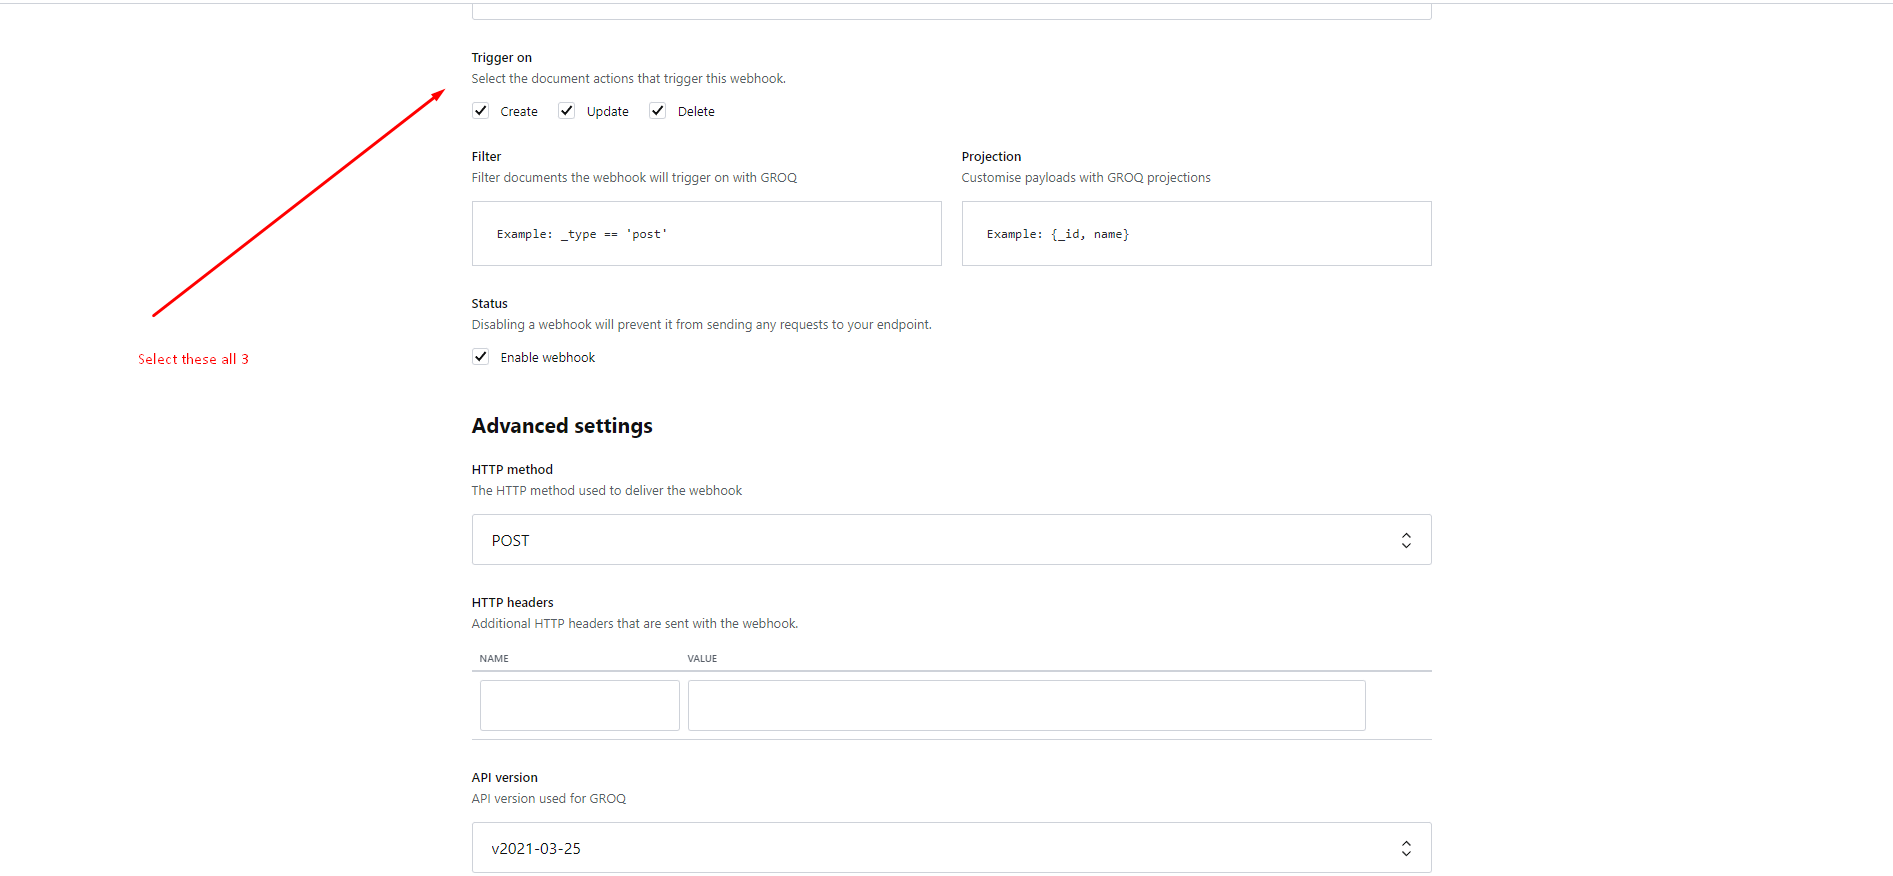
9. Go into your sanity manage panel in the api tab click on create webhook. In that give it a name and fillout the must filled forms and here in the url section paste previous copied url of the vercel deploy hook. And in trigger on section select all three. No advance settings required just save it.
For more deployment instruction you can follow this Linkof official document.
Some Screenshots given below for better understanding
Sources & Credits
- Fonts
- Montserrat
- Rubik
- Icon
- FontAwesome
- CSS Framework
- Bootstrap
- React Bootstrap
- Material UI
- React Libraries
- React Slick
- React Toastify
- react-countup
- Content Management System(Sanity)
Supports
Thank you for reading the documentaion. If you still have any question or any problem, please contact with us. We will give you best support.
Vyse Solution